The right way to deploy a ASP.NET application to Windows Azure
Jürgen Gutsch - 08 January, 2016
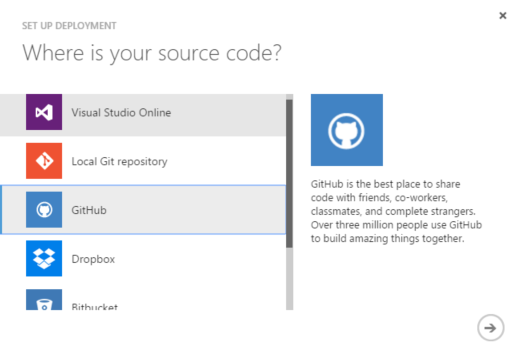
Deploying a web site continuously to an Azure Web App is pretty easy today. Just click "Set up deployment from source control" and select the source code provider you want to use and continue to log-on to your provider and select the right repository.
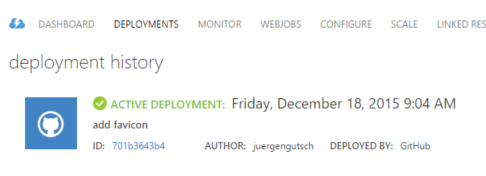
Now you get a new deployment tab in your Azure Web App where you can see the deployment history, including possible deployment errors.
You will find a more detailed tutorial here: Continuous deployment using GIT in Azure App Service
This is pretty cool, isn't it?
Sure, it is. But only if it is a small website, a small uncritical app or a demo to show the easy deployment to azure. The deployment of this Blog is set up in this way. With this kind of deployment, the build of the application is done on the Azure Web App with Kudu which is working great.
But I miss something here, if I want to deploy bigger and more complex web application.
How can I run my unit tests? What about email notifications on broken build? What if you need some special tasks while or before building the application?
You can add a batch or a powershell file to manipulate Kudu process to do all this things. But there is too much to configure. I have to write my own scripts to change the AssemblyInfos, to send out any email notification, to create test reports and so on. I would write all the things, a real build server can already do for me.
I prefer to have a separate real build server which does the whole job. This are almost all tasks I usually need to do on a continuous deployment job:
- I need to restore the packages first to make the builds baster
- I need to set the AssemblyInfo for all included projects.
- I need to build the complete solution
- I need to run the unit test and possibly some integration tests
- I need any deployment
- a web application to an Azure Web App
- a library to NuGet
- a setup for a desktop application
- I need to create a report of the build and test results
- I want to send an email notification in case of errors
- I want to see a build history
- I want to see the entire build output of a broken build Dependent on the type of the project there are some more or maybe less tasks to do.
I prefer Jenkins as a build server but this doesn't really matter. Any other real build server can also do this this work.
To reduce the complexity on the build server itself, it only only does the scheduling and reporting part. The only thing it executes is a small batch file which calls a FAKE script. Since a while FAKE gets my favorite build script language. FAKE is an easy to use DSL for build task written in F#. MsBuild also works fine, but it is not as easy as FAKE. I used MsBuild in the past to do the same thing.
In my case Jenkins only fetches the sources, executes the FAKE script and does the reporting and notification stuff.
FAKE does the other tasks including the deployment. I only want to show how the deployment looks like with FAKE. Please see the FAKE documentation to learn more about the other tasks it. There are many examples and a sample script online.
This is how the build task to deploy a ASP.NET app in FAKE looks like
// package and publish the application
let setParamsWeb = [
       "DebugSymbols", "True"
       "Configuration", buildConf
       "Platform", "Any CPU"
       "PublishProfile", publishProfile
       "DeployOnBuild", "true"
       "Password", publishPassword
       "AllowUntrustedCertificate", "true"
   ]

Target "PackageAndDeployWebApp" (fun _ ->
    MSBuild buildDir "Build" setParamsWeb ["My.Solution/My.Project.Web.csproj"]
     |> Log "AppBuild-Output: "
)
The parameter listed here are MsBuild properties. This all looks like a usual MsBuild call with FAKE and it really is a simple MsBuild call. Only the last four parameters are responsible to deploy the web app.
We need to add a publish profile to our project. To get this you have to download the deployment settings from the web apps dashboard on Azure. After the download you need to import the settings file to the publish profiles in Visual Studio. Don't save the downloaded file to the repository because it contains the publish password. The publish profile will be saved in the web apps properties folder. Just use the file name of the publish profile here, not the entire path. I pass the profile name from Jenkins to the script, because this script should be as generic as possible and should be used to deploy to development, to staging and to production environments. The publish password is also passed from Jenkins to the FAKE script, because we don't wont to have passwords in the GIT repository. DeployOnBuild calls the publish target of MsBuild and starts the deployment based on the publish profile. AllowUntrustedCertificate avoids some problems with bad certificates on Azure. Sometimes MS forgets to update their certificates.
All variables used here are initialized like this:
let buildDir = "./output/"

let buildConf = getBuildParamOrDefault "conf" "Retail"
let buildNumber = getBuildParamOrDefault "bn" "0"
let buildVersion = "1.16." + buildNumber

let publishProfile = getBuildParamOrDefault  "pubprofile" ""
let publishPassword = getBuildParamOrDefault  "pubpwd" ""
To pass any variable from the build server to the FAKE script just change the sample batch file a little bit:
@echo off
cls
"My.Solution\.nuget\nuget.exe" "install" "FAKE" "-OutputDirectory" "tools" "-ExcludeVersion"
"tools\FAKE\tools\Fake.exe" ci\build.fsx %*
exit /b %errorlevel%
Sure it isn't such easy as the Kudu way, but it is simple enough for the most cases. If the Build needs some more complex tasks, have a look at the FAKE documentation and in the corresponding Git repository. They have a solution for almost all the things to do in a build. But the best thing about F# is, you can easily extend FAKE with your own .NET code written in C#, F#, whatever...


